
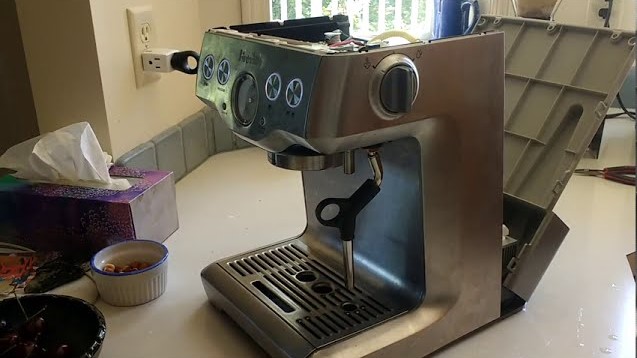
If your Breville coffee maker water level sensor is not working, it is likely due to mineral buildup, a stuck magnetic float, or sensor misalignment. This guide walks you through simple cleaning and troubleshooting steps to restore your machine’s functionality without the need for expensive professional repairs.
There is nothing quite like that first sip of coffee in the morning to kickstart your day. We rely on our Breville coffee makers to provide that consistent, perfect cup, so it can be incredibly frustrating when the machine decides to go on strike.
If you have noticed that your Breville coffee maker water level sensor not working has become a persistent issue, you are certainly not alone. It is a common annoyance for many coffee lovers, but the good news is that it is often a problem you can solve right at your kitchen counter.
By 2026, Breville machines have become even more sophisticated, yet the fundamental physics of how they track water levels remains largely the same. Whether you are using a Barista Express, a Bambino, or an Oracle, the sensor system is designed to keep your machine safe by preventing it from running dry.
When that system fails, the machine might stop mid-brew or show an annoying error light that just will not go away. Let’s dive into how to fix this so you can get back to your caffeine routine.
Key Takeaways
- Mineral Buildup: Limescale and calcium deposits are the primary culprits behind a faulty water level sensor.
- The Magnetic Float: Most Breville models use a magnetic float that can get stuck; checking this should be your first step.
- Descaling is Essential: Regular maintenance with descaling solutions prevents sensor errors before they happen.
- Sensor Misalignment: Sometimes the internal sensor needs a simple reset or repositioning to detect the water level accurately.
- Water Quality Matters: Using filtered water can significantly reduce the frequency of sensor issues in your Breville machine.
Understanding How the Sensor Functions
To fix the problem, we first need to understand how the machine “sees” the water. Breville coffee makers typically use a magnetic float system located inside or near the water reservoir. As the water level rises and falls, the float moves with it.
A sensor on the main body of the machine detects the magnet inside that float. When the water gets too low, the magnet moves out of range, and the machine triggers an error message to prevent damage to the internal pump.
Why Sensors Fail Over Time
The most frequent cause for a Breville coffee maker water level sensor not working is simply the accumulation of mineral deposits. Even with filtered water, your machine will eventually develop a layer of limescale.
This scale can coat the float, making it heavy, or build up on the walls of the reservoir, preventing the float from moving freely. When the float stays stuck in one position, the sensor thinks the tank is either always full or always empty, leading to those confusing error lights.
The Role of Magnetism
Because the system relies on magnets, external factors can sometimes interfere. If you have recently moved your machine or placed a magnetic item too close to the reservoir area, you might unintentionally disrupt the signal.
Furthermore, if the float itself loses its magnetic charge over many years of use, the machine will fail to register the water level correctly. While rare, it is a possibility for older machines that have seen heavy daily use.
Step-by-Step Troubleshooting for the Reservoir
Before you call customer support or start looking for replacement parts, you should perform a deep clean of the water reservoir. Most of the time, this is all that is needed to resolve the issue. Start by removing the reservoir completely from the machine and washing it with warm, soapy water. Use a soft brush to scrub the area where the float sits to ensure there is no grime inhibiting its movement.

Visual guide about Breville Coffee Maker Water Level Sensor Not Working
Image source: static-data2.manualslib.com
Checking the Magnetic Float
Once the reservoir is clean, inspect the small plastic piece that acts as the float. Does it bob up and down freely when you tilt the reservoir? If it feels sluggish or stuck, take a cotton swab and clean the housing around it.
Sometimes, a tiny bit of coffee residue or calcium can act like glue. If you can see the float, give it a gentle nudge. It should react instantly to gravity. If it stays stuck even after cleaning, you may need to use a descaling solution to break down the minerals inside the float housing.
Proper Seating of the Tank
Believe it or not, sometimes the Breville coffee maker water level sensor not working isn’t broken at all; it just isn’t seated correctly. If the reservoir isn’t pressed firmly into the base of the machine, the sensor in the body won’t align with the magnet in the tank. Remove the tank, check the connection port for any debris, and click it back into place firmly. You should hear a distinct click or feel a solid connection.
The Importance of Proper Descaling
If you aren’t descaling your Breville machine regularly, you are setting yourself up for sensor failure. Descaling is the process of removing mineral buildup from the internal tubing and the sensors. In 2026, most modern Breville machines have built-in prompts to remind you to descale, but if yours is older, you should aim to do this every two to three months, depending on the hardness of your water.
Choosing the Right Solution
You can purchase official Breville descaling powder, which is formulated to be gentle on internal components while being aggressive on calcium. Avoid using harsh chemicals or pure vinegar if your user manual explicitly warns against it, as these can sometimes corrode the delicate sensor seals. A proper descaling cycle will often clear up the pathways surrounding the water level sensor, allowing it to function accurately again.
The Manual Descaling Method
If the automatic cycle isn’t clearing the sensor error, try a manual approach. Fill the reservoir with a mix of water and descaler, and let it sit for about 30 minutes. This gives the solution time to dissolve any hardened calcium blocking the float mechanism.
After 30 minutes, run half of the tank through the hot water spout and the coffee group head. Let it sit for another 15 minutes, then run the rest through. This “soak and flush” method is often far more effective than a quick cycle.
Common Sensor Errors and What They Mean
Different Breville models have different ways of telling you that the water level sensor is acting up. On machines with digital displays, you might see specific codes like “Fill Tank” even when the tank is full. On simpler models, you might see a flashing light that persists regardless of the water level. Understanding these signals helps you narrow down the issue.
The “Always Empty” Error
If your machine insists that the tank is empty even when it is filled to the brim, the sensor is likely failing to detect the magnet. This usually means the float is stuck at the bottom of the reservoir or the magnet has been dislodged.
Check the tank walls for any obstruction. If the float is floating but the machine still complains, the problem might be the sensor inside the machine. In this case, you can try unplugging the machine for ten minutes to reset the internal board, then plugging it back in.
The “Always Full” Error
A more dangerous error is when the machine thinks the tank is full when it is actually empty. This can lead to the pump running dry, which can permanently damage your coffee maker. If your machine is showing a “full” status when the tank is out, stop using it immediately.
This indicates that the sensor is stuck in the “closed” position. This often requires a more technical fix, such as opening the machine to inspect the sensor wire or replacing the sensor assembly entirely.
Preventative Maintenance for Long-Term Success
Once you have resolved your Breville coffee maker water level sensor not working, you want to make sure it stays fixed. The best way to do this is to change your daily habits. Start by using filtered water exclusively. High-mineral “hard” water is the #1 enemy of coffee makers. By using a water filtration pitcher or a built-in filter, you significantly extend the lifespan of all internal sensors.
Cleaning the Reservoir Regularly
Don’t wait for the machine to show an error code to clean the tank. Make it a habit to rinse the reservoir every time you refill it. Once a week, give it a quick wash with mild dish soap. This prevents the formation of the “biofilm” or slime that can occur in standing water, which can contribute to the float sticking. Keeping the tank clean is the easiest way to prevent future sensor malfunctions.
Watching the Magnet
If you notice the float looking discolored or scratched, check it for cracks. If water gets inside the float itself, it will become waterlogged and won’t bob up and down properly. If you find your float is damaged, you can often order a replacement reservoir or just the float component from authorized parts dealers. It is a cheap fix that saves your entire machine.
When to Seek Professional Help
Sometimes, despite your best efforts, the sensor just will not cooperate. If you have cleaned the tank, descaled the machine, and performed a system reset, yet the Breville coffee maker water level sensor not working persists, there may be an electrical fault. Internal wires can sometimes vibrate loose, or the sensor board itself may have failed due to age or a power surge.
Checking Your Warranty Status
Before you open the chassis of your machine, check your warranty. If your Breville machine is still under warranty, do not attempt to disassemble it. Opening the casing will almost certainly void your coverage. Contact Breville support, describe the troubleshooting steps you have already taken, and ask for a repair or replacement. Their support team is generally very helpful, especially when you can show that you have already performed the standard maintenance steps.
Repairing vs. Replacing
If your machine is out of warranty, you have a decision to make. Replacing a sensor module is often affordable if you are comfortable with basic DIY repairs. Many online communities have excellent tutorials for specific models.
However, if the machine is quite old and showing other signs of wear, it might be more cost-effective to upgrade to a newer model. By 2026, newer Breville machines feature improved sensor technology that is less prone to the mechanical issues seen in older designs.
Ultimately, a malfunctioning sensor is a manageable problem. By staying consistent with cleaning and descaling, you keep your machine running smoothly and ensure that every cup of coffee is as delicious as the first. Don’t let a small piece of plastic stop your coffee flow; with these tips, you have the power to fix your machine and get back to enjoying your morning brew.
Frequently Asked Questions
Why is my Breville coffee maker showing a “fill tank” light when it is already full?
This is usually caused by the magnetic float inside the tank getting stuck due to mineral buildup or coffee residue. Try cleaning the tank and the float housing with a soft brush and warm, soapy water to restore its movement.
Can I use vinegar to clean the water level sensor?
While vinegar is a common household cleaner, check your specific manual first. Some manufacturers advise against it as it can be too acidic for internal seals; using a dedicated descaling solution is generally safer and more effective.
How often should I descale my machine to prevent sensor issues?
For most users, descaling every 2 to 3 months is sufficient. If you have particularly hard water, you may need to descale more frequently to prevent calcium deposits from clogging the sensor float.
Will moving the coffee maker affect the water level sensor?
It shouldn’t, but be careful not to place the machine near strong magnets or heavy electrical appliances that could theoretically interfere with the magnetic sensor. Ensure the tank is firmly “clicked” into place every time you move the machine.
What should I do if the float inside the tank is damaged?
If the float is cracked, waterlogged, or no longer magnetic, you should replace it. Most manufacturers sell replacement reservoirs or individual float components, which is much cheaper than replacing the entire coffee machine.
Is it safe to keep using the machine if the sensor is acting up?
No, you should stop using it immediately. If the sensor is stuck and the machine thinks the tank is full when it is actually empty, you risk running the pump dry, which can cause permanent, irreversible damage to your coffee maker.