
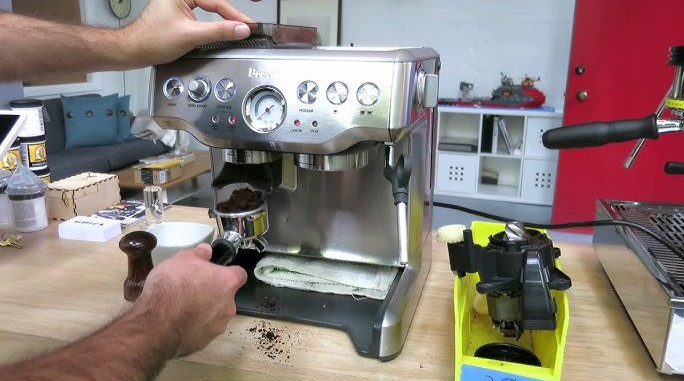
If your Breville coffee maker grinder not working, the issue is often caused by oil buildup, an empty hopper, or an improperly seated grind chamber. By following these simple troubleshooting steps and performing regular maintenance, you can quickly restore your machine to peak performance and enjoy fresh coffee again.
There is nothing quite like the morning ritual of a freshly brewed cup of coffee. You step into the kitchen, the sunlight is streaming in, and you are ready for that first sip of aromatic bliss. You go to your trusted Breville machine, press the button, and suddenly silence.
Your Breville coffee maker grinder not working leaves you stranded without your caffeine fix. It is a frustrating scenario, but you are certainly not alone. As we move through 2026, these machines remain some of the most popular in kitchens worldwide, yet they are still prone to the occasional mechanical hiccup.
The good news is that when your Breville coffee maker grinder not working, it is usually a sign that the machine is asking for a little bit of love and attention. These devices are precision instruments, and like any high-quality tool, they need proper care to function correctly.
Whether it is an accumulation of stale coffee oils or a simple safety sensor issue, most problems can be solved right on your kitchen counter. Let us dive into the common culprits and get your morning routine back on track.
Key Takeaways
- Clear the Blockage: Most grinding issues stem from old coffee oils and fine particles clogging the burrs.
- Check the Hopper: Ensure the bean hopper is locked into place, as safety sensors prevent the motor from running if it is loose.
- Adjust the Settings: Sometimes the grind size is set too fine, causing the burrs to jam against each other.
- Listen for the Motor: A humming motor without grinding suggests a physical obstruction or a jammed burr set.
- Regular Maintenance: Cleaning your grinder every two weeks prevents the buildup that leads to mechanical failure.
- Warranty Check: Always verify your warranty status before attempting internal repairs or using non-authorized replacement parts.
The Anatomy of the Problem: Why Your Grinder Stops
Before we start taking things apart, it helps to understand why the grinder might stop. At its core, the Breville grinder uses conical burrs to crush coffee beans. These burrs are sensitive to the beans you choose and how often you clean the machine. When your Breville coffee maker grinder not working, it is often a defensive reaction by the machine to protect its internal motor from damage.
Safety Sensors and Improper Seating
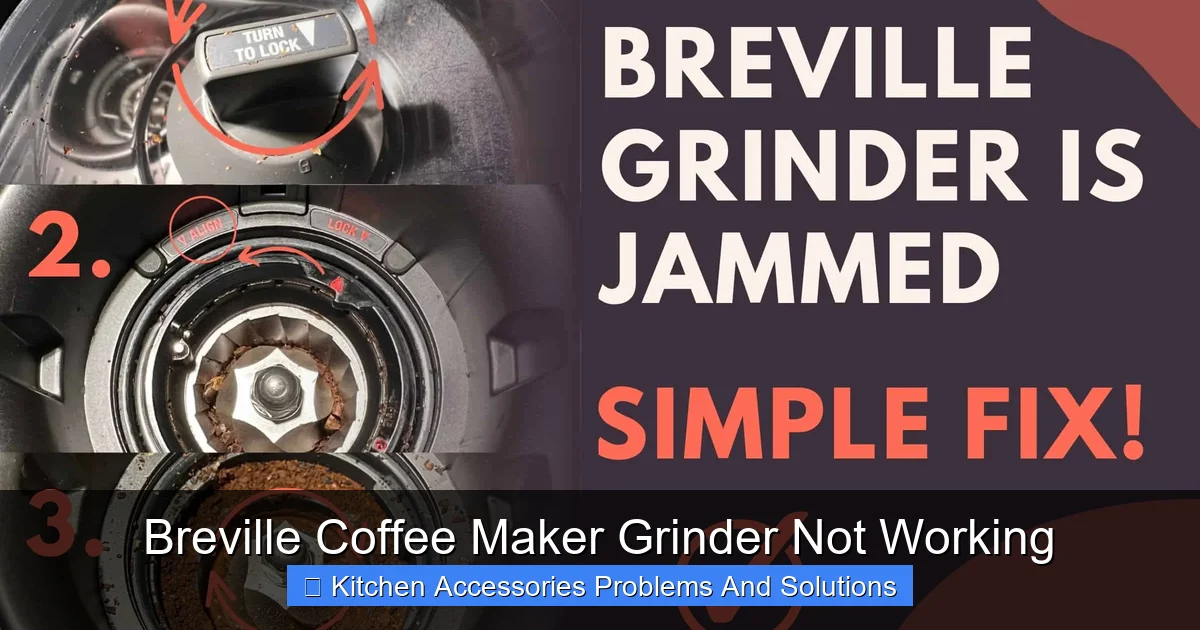
Modern Breville machines are equipped with smart safety sensors. These sensors act as a gatekeeper. If the bean hopper is not twisted into the “locked” position, the machine will not send power to the grinder motor. It is a safety feature to ensure you do not accidentally get fingers near the moving parts. Often, a simple twist of the hopper is all it takes to hear that satisfying click that restores function.
The Role of Coffee Oils
Coffee beans are naturally oily. Over time, these oils travel from the beans into the grinder chamber. They mix with “fines,” which are tiny, powdery particles of coffee. This combination creates a thick, gummy paste that can harden inside the burr assembly. When this paste builds up, the burrs become stuck. If the motor tries to turn but the burrs are glued together, the machine will stop to prevent the motor from burning out.
Step-by-Step Troubleshooting for Common Glitches
When you discover your Breville coffee maker grinder not working, take a deep breath. You do not need to be an engineer to fix this. Start with the easiest checks first and work your way toward more involved maintenance.
Visual guide about Breville Coffee Maker Grinder Not Working
Image source: jontic.com
Checking the Hopper and Grind Settings
First, empty the hopper and look inside. Are there any rogue objects, like a stray pebble in your bag of beans, or a hard piece of debris? Remove it carefully. Then, check your grind size dial. If you have been grinding extremely fine for a long time, try adjusting the dial to a coarser setting. Sometimes, the burrs become “caked” in the finest setting and need a little bit of room to move again.
Manually Clearing the Burr Assembly
If the hopper is secure and the settings are correct, it is time to dig a little deeper. Most Breville models allow you to remove the top burr. Take it out and look for that gummy residue we mentioned earlier.
Use a stiff-bristled brush to clear away all the old coffee grounds. You might be surprised at how much debris was hiding in the teeth of the burr. Once the area is clear, vacuum out any loose dust and replace the burr, ensuring it clicks firmly into place.
When the Motor Hums but Nothing Happens?
There is a distinct difference between a machine that is totally silent and one that makes a humming noise. If your Breville coffee maker grinder not working and you hear a hum, it usually means the motor has power, but the burrs are physically prevented from spinning. This is a classic symptom of a “jammed” grinder.
Addressing a Serious Jam
If clearing the top burr does not help, you may have a jam lower down in the chute. Use a small wooden skewer or a dedicated cleaning tool to gently poke into the exit chute where coffee grounds normally drop into the basket.
Do not use metal objects like knives, as these can scratch the burr surfaces or cause an electrical short. Gently wiggle the tool to dislodge any compacted grounds. Often, a large clump of coffee will fall out, and the machine will start right back up.
Considering Bean Roast Levels
Are you using very dark, oily roasts? Dark roast beans are notorious for causing issues in high-end grinders. The oils are on the surface, making them more likely to create that gummy paste that stops a grinder in its tracks. If you use dark roasts regularly, your cleaning interval needs to be much shorter. Try switching to a medium roast for a few days to see if the issue persists.
Maintenance Habits to Prevent Future Failures
Prevention is always better than a frantic search for a fix. By incorporating a few simple habits into your weekly routine, you can ensure that you never have to deal with your Breville coffee maker grinder not working again.
Weekly Brushing
Every Sunday, take two minutes to brush out your grinder. You do not need to do a deep, intensive clean every time. Simply removing the top burr and using a soft brush to clear away the loose grounds will prevent the buildup of that stubborn, gummy paste. Think of it as a quick “dental cleaning” for your coffee machine.
Using Grinder Cleaning Pellets
There are products specifically designed to clean grinder burrs. These are food-safe, grain-based pellets that you run through the grinder. As they pass through, they absorb oils and dislodge particles that your brush might miss. Running a capful of these through the machine every month is a fantastic way to keep the inner workings pristine.
Proper Storage of Beans
Keep your coffee beans in an airtight container away from heat and moisture. While it might be convenient to keep a massive bag of beans in the hopper for weeks, this exposes them to air and causes the oils to go rancid faster. Only put what you need for a few days into the hopper. This keeps the beans fresh and reduces the amount of oil that settles into the grinding mechanism.
Understanding Your Warranty and Professional Support
If you have tried everything and your Breville coffee maker grinder not working still, it might be time to look into professional options. It is important to know your rights as a consumer in 2026.
Checking Your Coverage
Breville typically offers a one-year or two-year warranty on their machines, depending on your region and specific model. Check your manual or the confirmation email from your purchase. If you are within the warranty period, do not attempt to open the motor housing or unscrew internal panels. This could void your warranty and prevent you from getting a free repair or replacement.
Contacting Authorized Service Centers
If the motor has failed electronically meaning it makes no sound at all and does not respond to cleaning—you likely need an expert. Reach out to Breville’s customer support. They have a network of authorized service centers that can perform specialized repairs. Be prepared to provide your model number and serial number, which can usually be found on the base of the machine.
The Joy of a Working Grinder
There is a certain level of satisfaction that comes from troubleshooting and fixing your own kitchen appliances. When your Breville coffee maker grinder not working, it feels like a disruption to your life, but resolving it allows you to get back to the craft of coffee making. Once you have cleared the burrs, aligned the hopper, and heard that familiar whir of the motor, that first cup of coffee will taste even better.
Remember, these machines are built to last, but they require a partnership with their user. Keep the hopper clean, choose your beans wisely, and never force a jammed grinder to work by repeatedly pressing the button. With a little care, your machine will continue to provide you with delicious, fresh-ground coffee for years to come.
Final Thoughts on Longevity
As we navigate the technology of 2026, we see that while machines have become smarter, the fundamentals of grinding coffee remain the same. Friction, heat, and oil are the primary enemies of a smooth grind. By respecting these simple physical realities, you maintain control over your equipment. If you ever find yourself struggling again, just come back to these steps, perform a quick reset, and enjoy the perfect brew.
Frequently Asked Questions
Why is my Breville grinder making a loud clicking sound?
A loud clicking sound often indicates that the burrs are touching or that there is a hard object like a small stone caught in the mechanism. Turn the machine off immediately, remove the beans, and inspect the burr chamber for debris or adjust your grind setting to be coarser.
How often should I clean the internal burrs?
For the best performance, you should perform a light cleaning of the top burr every two weeks. If you use dark, oily beans, you may need to clean it more frequently to prevent the accumulation of coffee residue.
Can I use water to clean the grinder burrs?
No, you should never use water to clean the internal grinding mechanism, as moisture can cause the metal burrs to rust and may damage the electrical components. Use a dry, stiff-bristled brush or a vacuum cleaner attachment to remove grounds.
Does the age of the beans affect the grinder?
Yes, older beans can become brittle or dry, which might affect the grind consistency. However, very oily beans are more likely to cause clogs and stop the grinder from working altogether.
What if the hopper is locked but the grinder still won’t start?
If the hopper is locked and the motor is silent, check to ensure the grind chute isn’t completely blocked by compacted coffee. If there is no sound at all, the machine might have an electrical fault or a tripped internal safety switch that requires professional inspection.
Is it safe to open the base of my Breville machine?
Opening the base or motor housing is not recommended, as it can be dangerous and will almost certainly void your manufacturer’s warranty. Stick to removing the bean hopper and the top burr assembly for regular maintenance.