
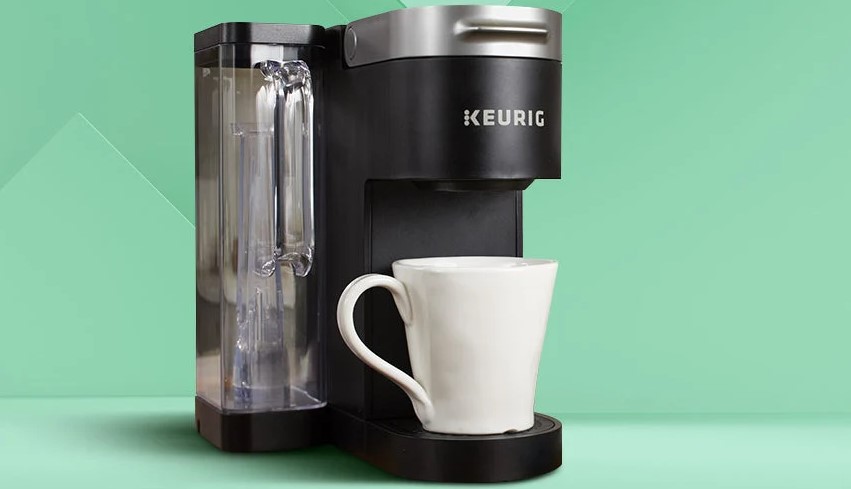
If your Keurig coffee maker not working after descaling feels frustrating, you are not alone. Most of these issues stem from air bubbles or mineral deposits blocking the pump, which are easily fixed with a few simple DIY steps. Follow this guide to get your morning brew back on track without needing a professional technician.
There is nothing quite like the disappointment of waking up, ready for that first steaming cup of coffee, only to find your machine unresponsive. You did the responsible thing. You took the time to descale your machine, following the instructions to keep it clean and healthy. Yet, suddenly, you have a Keurig coffee maker not working after descaling. It feels like a cruel joke, doesn’t it?
Don’t worry, friend. I have been there more times than I can count. When a Keurig coffee maker not working after descaling occurs, it is usually not because the machine is broken beyond repair. In almost every case, it is just a little bit confused or blocked by a tiny air bubble. We can fix this together in just a few minutes using items you already have in your kitchen.
Key Takeaways
- Airlocks are common: The most frequent reason for a Keurig coffee maker not working after descaling is trapped air in the internal tubing.
- Sensor sensitivity: Descaling can sometimes trigger a “descale” light loop that requires a specific sequence of button presses to reset.
- Debris blockage: Dislodged calcium flakes can move from the boiler and clog the exit needle, stopping the water flow completely.
- The turkey baster trick: Using a manual pump to force water into the reservoir intake is often the fastest way to clear a stubborn air blockage.
- Water quality matters: Always use filtered water to prevent the rapid buildup of scale that necessitates frequent, messy descaling sessions.
- Patience is key: Do not force any parts; gently cycling the power and following the correct reset sequence usually resolves software-related glitches.
Understanding Why Your Machine Stopped
To fix the problem, we first need to understand what is actually happening inside that plastic shell. When we run a descaling solution through the machine, we are essentially melting away years of mineral buildup. Sometimes, this process is so effective that it breaks off a small piece of sediment. If that piece of debris travels to the wrong place, it acts like a tiny boulder in a river, stopping the flow of water entirely.
The Common Culprit: The Airlock
The most frequent cause for a Keurig coffee maker not working after descaling is an airlock. Think of the plumbing inside your machine like a straw. If you have a straw filled with water and you blow air into it, you get a bubble.
That bubble acts as a wall. The pump inside your Keurig is designed to push water, not air. If there is an air pocket sitting right in front of the pump, it will just spin and spin, unable to grab the liquid it needs to heat up and brew.
Sensor Glitches and Software Loops
In 2026, many of our machines are smarter than ever before, which sometimes creates new problems. If your machine is showing a “Descale” light even after you have finished the process, the sensor might be stuck.
The machine thinks the scale is still there because the internal water flow sensor hasn’t registered the clean water cycle correctly. It is a safety feature meant to protect the heater, but it can be annoying when it doesn’t turn off as expected.
Step-by-Step Fixes for Flow Issues
When you notice your Keurig coffee maker not working after descaling specifically when it won’t pump water the first thing you should try is the “force prime” method. This is a very simple technique that helps push that stubborn air bubble out of the system. You don’t need fancy tools, just a bit of patience and perhaps a turkey baster or a large syringe.

Visual guide about Keurig Coffee Maker Not Working After Descaling
Image source: i.ytimg.com
The Baster Technique
If the machine is making a loud buzzing sound but nothing comes out, it is definitely an airlock. Take a turkey baster and fill it with fresh, filtered water. Remove the water reservoir from the back of the Keurig. Look at the small intake valve at the bottom.
Use the baster to forcefully squirt water into that valve. This forces water directly into the internal pump, which should push the air bubble out of the way. Repeat this two or three times, put the reservoir back, and try to brew a cup again.
Checking the Exit Needle
Sometimes, the scale we removed during the cleaning process gets stuck in the exit needle the part that pierces the K-Cup. If this is clogged, the water will have nowhere to go, and the machine will stop mid-brew.
Take a straightened paperclip and very gently poke it into the needle area under the lid. Move it around slightly to clear out any gunk that might have settled there. Be careful not to damage the needle, but a firm clearing often does the trick.
Troubleshooting the “Descale” Light
It is incredibly frustrating when you have spent an hour cleaning the machine, yet the “Descale” light stays on. This is a common issue when a Keurig coffee maker not working after descaling is actually just a communication breakdown between the sensor and the brain of the machine. Most often, the machine just needs to be “told” that the process is finished.
The Power Reset Routine
The first thing to try is a hard reset. Unplug the machine from the wall outlet and let it sit for at least an hour. This drains the capacitors on the circuit board and allows the machine to “forget” its current state.
When you plug it back in, the sensors often recalibrate themselves. If the light is still there, try running one more full reservoir of plain water through it. Sometimes, the sensor just needs that extra rinse to confirm the water is flowing clearly.
The Hidden Reset Button
On many models, you can trigger a reset by holding down specific buttons while powering on the device. For most machines, if you hold the “8oz” and “10oz” buttons simultaneously while plugging it in, the machine enters a service mode. Check your specific manual online for your model, as this sequence varies, but it is a powerful way to clear persistent software errors.
Preventing Future Problems
We want to avoid a Keurig coffee maker not working after descaling in the future. The best way to do this is to improve the quality of water entering the machine in the first place. Minerals in tap water are the primary cause of scale buildup. Using a charcoal water filter attachment, which most Keurig models support, will drastically slow down how quickly your machine gets dirty.
Stick to the Schedule
Many people wait until the “Descale” light turns on before they clean the machine. By that point, the scale is often quite thick and prone to breaking off in large chunks during the cleaning cycle. Instead, try to descale your machine every three months, regardless of whether the light is on. Smaller, more frequent cleanings prevent those large, blockage-prone flakes from forming.
Using the Right Solution
Avoid using harsh chemicals or industrial cleaners. The official Keurig descaling solution is formulated to be gentle on the internal plastic and rubber components.
If you prefer a homemade solution, use a mild mixture of white vinegar and water, but ensure you rinse the machine at least three or four times with plain water afterward. Vinegar has a strong smell that can linger if not rinsed out thoroughly, and it is more acidic than the proprietary solution, so don’t leave it in the machine for too long.
When It Is Time to Call Support?
Even with the best intentions, sometimes a component just fails. If you have tried the baster method, cleared the needle, and performed a hard reset, but your Keurig coffee maker not working after descaling persists, there might be a physical failure. A failed pump motor is not unheard of after a few years of heavy use.
Checking for Warranty
Before you toss the machine in the trash, check the serial number. Keurig often offers a one-year warranty on their brewers. If your machine is relatively new, contact their customer support line. They are surprisingly helpful, and if the machine is truly defective, they may offer a replacement or a discount on a new unit. Have your receipt or online order history ready when you call to make the process smoother.
Final Thoughts on Troubleshooting
Dealing with a broken morning routine is never fun, but remember that these machines are relatively simple devices. A Keurig coffee maker not working after descaling is almost always a sign that it just needs a little extra attention to clear an air bubble or a stray piece of mineral deposit. By staying calm and working through the steps priming the pump, checking the needles, and resetting the electronics you can usually save your machine.
Once you get that first cup of coffee brewing again, you will appreciate it all the more. Take a moment to enjoy the silence of a working machine and the rich aroma of your favorite roast. Your Keurig is back in business, and you are ready to take on the day.
Frequently Asked Questions
Why is my Keurig still saying “Descale” even after I cleaned it?
The sensor often needs a bit more time to register the clean water flow. Try running one or two extra reservoirs of plain water through the machine to clear any remaining solution, or unplug the unit for an hour to reset the sensor.
Can I use vinegar to fix a clogged Keurig?
Yes, vinegar is an effective descaling agent, but you must be careful to rinse the machine thoroughly afterward. Run at least four full cycles of plain water after using vinegar to ensure the coffee taste isn’t affected.
Is it safe to use a paperclip to clean the needles?
It is generally safe, provided you are very gentle. Use the paperclip to lightly wiggle around inside the exit needle to dislodge any coffee grounds or scale, but avoid applying too much force, which could puncture the internal rubber seal.
What does a loud buzzing sound mean?
A loud buzzing sound while no water comes out is the classic sign of an airlock. The pump is running, but it is only pushing air; use the turkey baster method described in the article to force water into the pump and break the air bubble.
How often should I actually descale my Keurig?
To keep the internal components in good shape and prevent heavy buildup, it is best to descale every three months. This prevents large chunks of scale from breaking off and causing those frustrating blockages during your cleaning process.
What if none of these steps work?
If you have tried the baster, cleared the needles, and reset the electronics without success, the internal pump may have failed. Contact Keurig customer support to see if your machine is still under warranty before considering a replacement.