
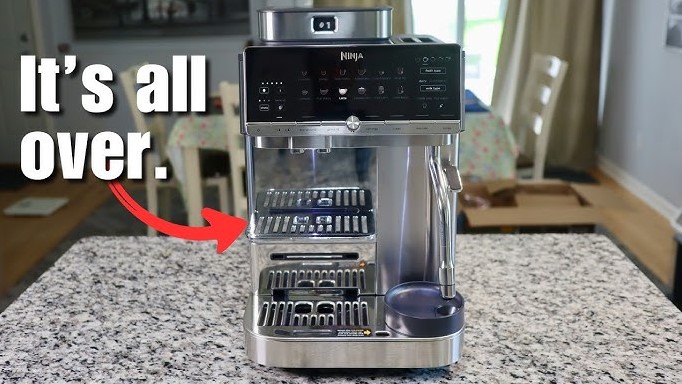
If you find your Ninja coffee maker not working, the most common culprit is usually a simple mineral buildup or a loose water reservoir. By following our expert 2026 troubleshooting guide, you can quickly clear clogs, reset the system, and get back to brewing your perfect morning cup without needing a costly repair.
There is nothing quite like the smell of fresh coffee in the morning to get your day started on the right foot. We have all been there you wake up, head to the kitchen, prepare your grounds, and press the button on your machine, only to realize your Ninja coffee maker not working as expected.
It can be incredibly frustrating when technology fails right when you need that first caffeine boost. Whether you are using the latest 2026 model or a trusty older version, these machines are generally reliable, but they do have a few quirks.
In this guide, we are going to walk through the most common reasons why you might find your Ninja coffee maker not working. We will cover everything from power issues and brewing delays to those pesky error codes that pop up on the display. By the end of this article, you will feel like a certified coffee technician, ready to handle any glitch that comes your way. Grab a cup of joe from a backup method for now and let us dive into the troubleshooting process.
Key Takeaways
- Mineral Buildup: Most Ninja coffee maker not working issues stem from calcium deposits that require a deep descaling cycle.
- Proper Assembly: Always ensure the water reservoir is clicked firmly into place, as a misaligned tank prevents the pump from engaging.
- Resetting the Unit: Sometimes a simple power cycle by unplugging the machine for 15 minutes clears electronic errors.
- The Drip Stop: Check the drip stop lever to ensure it is in the “open” position, as this is a frequent cause of overflow and brewing halts.
- Maintenance Matters: Running a vinegar or descaling solution every three months prevents the machine from breaking down prematurely.
Understanding Your Machine’s Power Issues
The most basic starting point for a Ninja coffee maker not working is the power supply. If your machine is completely dead and the lights aren’t turning on, do not panic. It is rarely a sign that the entire machine has given up on life. Most often, it is a simple connection or electrical safety feature.
Check the Power Connection
First, check the outlet. It sounds basic, but kitchen outlets are often GFI protected. If the breaker tripped, your machine won’t get any juice. Try plugging a different appliance into the same outlet to confirm it works. If the outlet is fine, inspect the power cord for any damage. Sometimes, a loose plug in the back of the Ninja machine itself can cause the power to flicker or fail completely.
Performing a Hard Reset
If the machine is plugged in but the display is blank or frozen, perform a hard reset. This is the “turn it off and back on again” of the coffee world. Unplug the unit from the wall and leave it unplugged for at least 15 to 20 minutes. This allows the internal capacitors to discharge completely. When you plug it back in, the system should reboot, often clearing temporary software glitches that cause your Ninja coffee maker not working symptoms.
Resolving Brewing Interruptions and Drip Issues
If your machine is turning on but refuses to brew, or if the water seems to be stuck, the problem is usually mechanical. This is where we look at the water flow and the various sensors that keep your Ninja safe from damage.

Visual guide about Ninja Coffee Maker Not Working
Image source: jontic.com
The Water Reservoir Misalignment
The most common mechanical issue involves the water reservoir. If it is not seated perfectly on the base, the valve at the bottom will not open. You might hear the pump humming loudly, but no water is flowing through the brew basket.
Take the reservoir off, check the base for debris, and snap it back on firmly. You should hear a distinct click. This simple fix solves a significant percentage of cases where users assume their Ninja coffee maker not working.
The Drip Stop Lever
Take a look at the drip stop lever on the side of the brew basket. If it has been pushed into the closed position, the water will stay in the basket, or worse, overflow because it has nowhere to go. Always ensure this is set to “open” before you start your brew cycle. It is a small feature, but it is a major factor in machine efficiency.
Clearing Clogs and Scaling
Over time, the minerals in your tap water like calcium and magnesium build up inside the internal heating pipes. This is called “scale.” Think of it like cholesterol for your coffee maker. As the buildup thickens, it restricts the flow of water, leading to a Ninja coffee maker not working properly or brewing coffee that tastes weak or lukewarm.
When to Run a Descaling Cycle
If your Ninja coffee maker is taking longer than usual to brew, or if the flow is sputtering, it is time for a deep clean. Many 2026 models feature a “Clean” light or an automated cycle. If yours does, pay attention to it. If not, follow the standard descaling procedure every three to six months, depending on the hardness of your local water supply.
The Descaling Procedure
To descale, fill the reservoir with a mixture of equal parts white vinegar and water. Place your carafe under the brew basket and select the largest brew size. Run the cycle until the reservoir is empty. After that, run at least two cycles with plain, fresh water to flush out any lingering vinegar taste. This process dissolves the mineral blockages and restores your machine to like-new performance.
Interpreting Error Codes and Alerts
Modern Ninja machines are smart. When they detect a problem, they often display an error code to tell you exactly what is wrong. If you see a code flashing on your screen, don’t ignore it. Consulting your manual is helpful, but here are the most common alerts you might see when you find your Ninja coffee maker not working.
Common Error Indicators
Often, you might see “E” codes. These usually indicate a sensor error, such as a water temperature issue or a thermal fuse problem. If you see an “E” error that doesn’t disappear after a hard reset, it might indicate a failing component that requires professional servicing. However, many codes are simply warnings that the unit needs to be descaled or that the brew basket is not properly inserted.
Brew Basket Sensors
The machine has a sensor that detects if the brew basket is fully inserted. If the basket is slightly loose, the machine will refuse to start for safety reasons. Remove the basket, check for stray coffee grounds that might be preventing a flush fit, and reinsert it. This is a very common scenario where a quick cleanup solves the problem instantly.
Maintenance Tips for Long-Term Reliability
Preventing a Ninja coffee maker not working scenario is much easier than fixing one. By adopting a few simple habits, you can extend the life of your appliance by several years. Maintenance is not just about fixing broken things; it is about keeping your morning ritual consistent.
Keep the Exterior and Components Clean
Every week, rinse out the permanent filter and the water reservoir. Coffee oils can build up and turn rancid, affecting the flavor of your coffee. If the machine looks dirty, wipe down the exterior with a damp cloth. Also, ensure the brew head the part that sprinkles water onto the grounds is free of crusty coffee buildup.
Use Filtered Water
Using filtered water is the single best way to keep your Ninja in top shape. Tap water is full of minerals that cause scale. By using filtered or bottled water, you reduce the amount of descaling you need to do and improve the taste of your coffee significantly. It is a small investment that pays off in both machine longevity and flavor profile.
Final Thoughts on Troubleshooting
Dealing with a kitchen appliance that refuses to cooperate is never fun, but it doesn’t have to ruin your day. As we have explored, most situations involving a Ninja coffee maker not working come down to water flow, mineral buildup, or simple sensor alignment.
By systematically checking your power, seating your components correctly, and staying on top of your descaling schedule, you can keep your machine running smoothly for years. Remember that your coffee maker is a complex tool working hard every day. It deserves a little TLC.
If you have tried all the steps above and your machine still won’t brew, don’t hesitate to reach out to the manufacturer or a local appliance repair professional. Your morning coffee is worth the effort, and with these troubleshooting steps, you are now well-equipped to handle any challenge that comes your way in 2026 and beyond.
Frequently Asked Questions
Why is my Ninja coffee maker making a loud noise but not brewing?
This usually happens because of an airlock in the system or because the water reservoir is not seated correctly. Try removing and firmly re-clicking the reservoir into place, or perform a descaling cycle to clear potential mineral blockages.
What does the “Clean” light mean on my Ninja?
The “Clean” light is a programmed reminder that the machine has detected significant calcium and mineral buildup inside the pipes. You should run a descaling cycle with a vinegar-water solution as soon as possible to maintain brewing quality.
Can I use soap to clean the inside of my Ninja?
You should never run soap through the internal brewing system, as it is nearly impossible to rinse out completely and will ruin the taste of your coffee. Only use a vinegar-water solution or a dedicated coffee machine descaling agent.
Why is coffee overflowing from the brew basket?
Overflow usually occurs if you have added too much coffee, if the coffee grind is too fine, or if the drip stop lever is in the closed position. Ensure your grind is “medium” and the drip stop is open before you start.
Is my machine broken if it won’t turn on at all?
Not necessarily. Check your home’s circuit breaker to ensure the outlet has power, then try unplugging the machine for 20 minutes to reset the internal electronics before plugging it back into a different wall outlet.
How often should I clean the brew basket?
You should rinse the brew basket and the filter after every single use to prevent old coffee oils from accumulating. A quick scrub with warm, soapy water once a week will keep the basket free of residue.